I’ve been very happy with the success of my vegetable garden, this year. Since the middle of June (and for another few weeks) my dinner plate has been (and will be) served with wholesome and fresh veggies… and this brings a smile to my face!
Every once in a while, I write about the different elements that create interesting photographs. For today’s blog I thought that it would be fun to showcase some of my garden’s harvested vegetables while taking you on a step by step journey to understand some simple photographic techniques.

Step #1 – Subject
The subjects for this photo-shoot are some of my harvest veggies. It took me just a minute or two to make this interesting ‘set’ filled with a Butternut squash, tomatoes, cherry tomatoes, carrots and peppers.

Step #2 – Get Close
Have you ever noticed how many times you’ve seen a photo with the subject matter smack-dab in the middle of the frame with all sorts of wasted space surrounding the subject? By getting in closer, you can fill the frame with the entire subject of your interest.

Step #3 – Get Closer
At the beginning on any photo-shoot I like to warm up a little bit. I’m not yet focussing on the perfect composition, at this point, just simply getting comfortable behind the camera. I get closer and closer to my subject matter while slowly moving my camera around and this allows me to become a bit more intimate with what I’m taking a picture of.

Step #4 – Composition
These simple vegetables are very interesting subjects to take photos of because there are so many wonderful curves, straight lines and angles to think about. Shapes, colours, foregrounds and backgrounds exist for the sole purpose of the photographer to manipulate while composing a perfect photo.
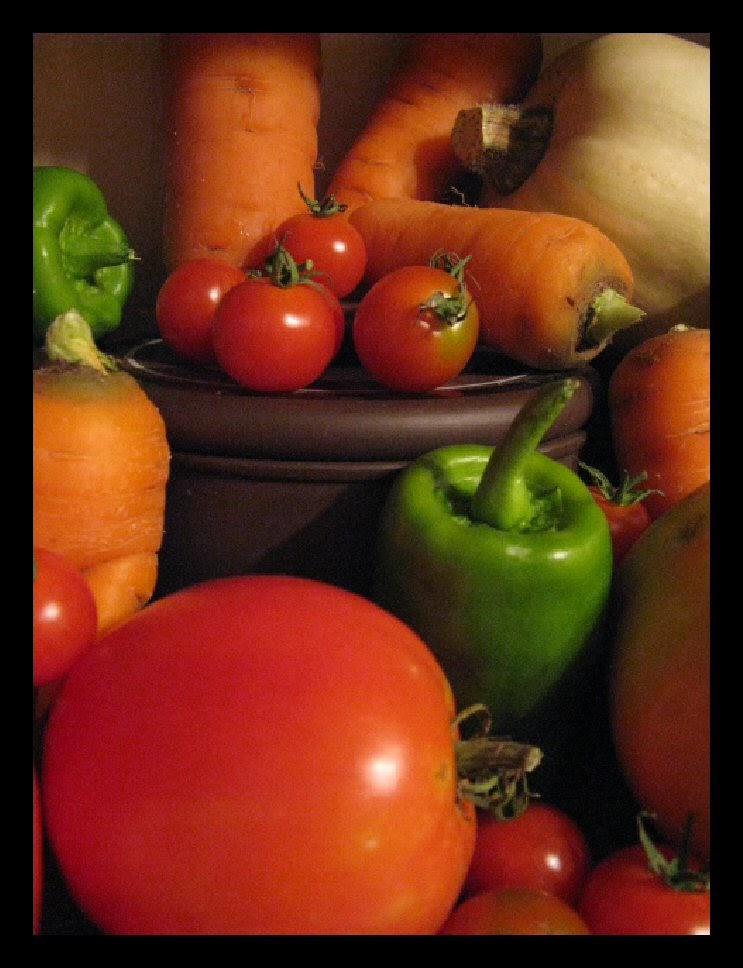
Step #5 – Move Around The Composition
If you compare this photo to the one above you will see that they are very similar. In this photo I’ve repeated ‘Step #3’ and I’ve gotten closer to my subject. The squash now appears on the right side while, above, it appeared on the left. Notice how the lid of the sugar bowl – at the bottom of this photo – helps to ‘ground’ the image by offering stability to the base of the photo while the slight curves of brown, black and white help to bring the viewers eye ‘into’ the image.

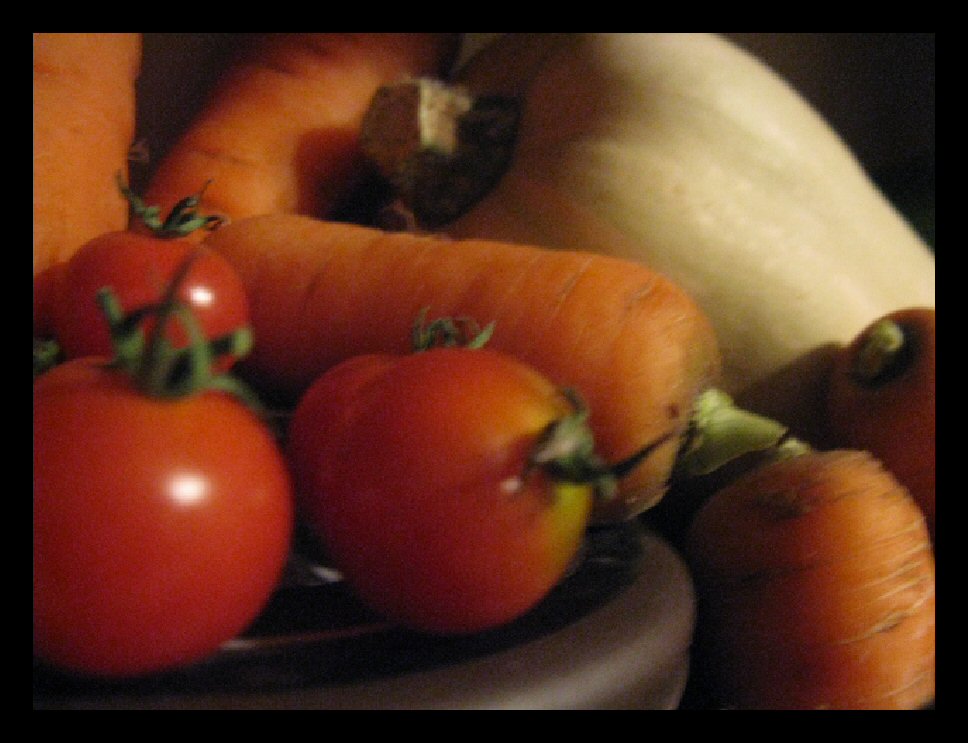
Step #6 – See All
Sometimes it’s difficult to see all that is happening while you are setting up a great composition. In this photo, I was concentrating so hard on capturing the interest shapes of the shadows as they curve up and around the carrots at the top of the image that I forgot to pay attention to my own shadow which ended up blocking the light on the tomatoes at the bottom of the image.
Step #7 – Be Patient
Be patient and let this experience bring you into a state of happiness. Throughout this story I’ve been sharing all the photos that I took during this ‘shoot’. This is the first one that I really like. With any photo-shoot that I do, I find that out of every 4 or 5 pictures I take only 1 will tickle my fancy and make me feel that I’ve done a good job.

Step #8 – Be Rewarded
I’m lucky to see that – this time – my average has gone up cuz this is the second – out of five – photo that I would classify as a success.
So, there ya go! A couple of easy steps to think about the next time you put yourself behind the lens of a camera.
After I’ve finished taking a bunch of pics, uploaded them onto my computer where I can resize them, enhance colours and add borders, I like to have a little fun trying out some of the ‘artistic effects’ that are available for me to use…

… so that I can turn an interesting photograph into an object d’art!

Be inspired! Enjoy the creativity that is inside you! Oh yea – and grow lot of vegetables to fill your heart and mind with the life-giving energies of the universe!!!
Jim


No comments:
Post a Comment